Window screens serve an essential function in our homes. They keep out insects while allowing fresh air to circulate, making them a staple in many households. Over time, these screens can suffer from wear and tear, leading to holes or tears that compromise their effectiveness. Repairing window screens is a straightforward process that can save you from the expense of purchasing new ones. This guide will walk you through the steps needed for effective window screen repair, empowering you to tackle the project with confidence.
Understanding Your Window Screens
Before diving into repairs, it’s helpful to familiarize yourself with the different types of window screens. Most commonly, they are made from materials like fiberglass or aluminum mesh. Fiberglass Daniel Kielb Window Screen Repair is lightweight and easy to work with but may not be as durable as aluminum. Aluminum, on the other hand, offers increased strength but can be prone to denting.
Screens typically come in two styles: fixed and removable. Fixed screens are secured in place and require more effort to repair, while removable screens can be taken out easily, making repairs simpler. Understanding your screen type will affect how you approach the repair process.
Assessing the Damage
Begin by examining your screen closely for any signs of damage. Look for holes, tears, or bent frames. Small holes can often be repaired with patch kits available at hardware stores. For larger tears or extensive damage to the frame itself, you may need to consider replacing parts or even the entire screen.
When assessing damage, it’s also crucial to check if the frame is warped or bent. If so, you’ll need tools such as pliers or a hammer for straightening before proceeding with repairs.
Tools and Materials Needed
Gathering your materials ahead of time will streamline your repair process. Here’s what you will typically need:
- Screen material (fiberglass or aluminum) A utility knife A spline roller Spline (the cord that holds the screen in place) Scissors Pliers Measuring tape A flat surface for work
With these items on hand, you'll be ready to tackle most standard repairs effectively.
Step-by-Step Repair Process
1. Remove the Screen Frame
If you have a removable screen, take it out carefully from its window frame. Use your hands to pull it away gently; if it's stuck due to dirt or paint buildup, carefully pry it free using a flat tool without damaging the screen itself.
For fixed screens, you'll need a screwdriver or drill to remove any screws securing it in place. Take care not to lose any screws during this process.
2. Inspect and Measure
Once removed, lay the screen flat on a work surface and inspect it thoroughly for damage beyond what's immediately visible. Measure any holes or tears that need repair so you know how much material you'll need when replacing sections of mesh.
3. Prepare Your New Screen Material
If you're dealing with small holes (less than half an inch), consider using patch kits specifically designed for such repairs. However, for larger tears or if you're replacing sections entirely:
Cut your new screen material slightly larger than the damaged area. Lay this over the existing mesh and ensure it extends beyond all edges of the torn area.For replacing an entire section of mesh within a frame:
Measure across both width and height of the frame. Cut new screening material based on those measurements.4. Attach New Screening Material
Align your new screen material over the frame opening where you're making repairs:
Lay it flat against one side first. Secure it by pressing down into place. Use a spline roller along the edges where necessary—this tool helps press down both screening and spline firmly into position without wrinkling.Make sure there are no gaps between where your new screening meets old materials; otherwise insects may still find their way through!
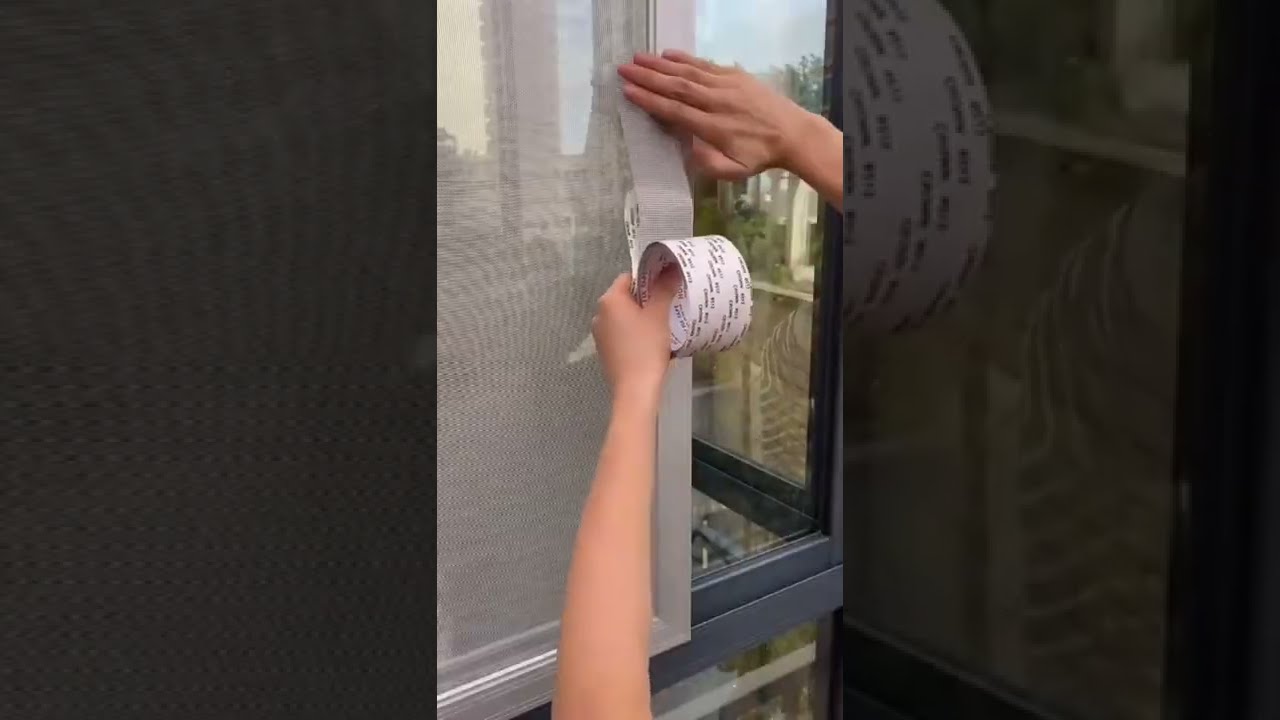
5. Secure Everything With Spline
Take your spline and lay it across each edge of where you've attached new screening:
Press down firmly using your fingers. Trim off excess mesh outside this area after everything looks aligned. Roll another pass with your spline roller over top—it should feel snug without being overly tight.Ensure that no parts stick up because this could lead to tearing later on when reinstalled back into frames.
6. Reinstall Your Screen Frame
After completing repairs:
If working with fixed frames: Align them back into their original positions within window openings. For removable frames: Carefully slide them back into place ensuring they're secure but not forced too tightly against weather stripping which could impair functionality long term.Check that all corners sit flush against surrounding surfaces before finalizing installation by re-tightening screws if applicable.
Maintenance Tips for Longevity
Once you've completed your window screen repair successfully:
- Regularly clean screens by gently vacuuming dust off surfaces every few months so dirt doesn't build up over time leading possible future issues. Inspect periodically throughout warmer seasons when bugs are most prevalent—catching minor issues early means less extensive repairs later!
Also remember that physical damage isn't only related just pests; sometimes strong winds can cause wear too!
Being proactive about maintenance can extend both life span—and effectiveness—of these critical household features significantly!
When To Replace Instead of Repair
While repairing is often feasible for small damages or minor tears there comes situations where replacement makes more sense economically long-term—especially if multiple areas show significant deterioration simultaneously Daniel Kielb rather than addressing singular pinholes repeatedly!
If frames become warped beyond correctable means then investing in either prefabricated options available online/hardware stores might yield better results overall considering labor involved making custom pieces unnecessarily costly compared alternatives readily accessible today!
Additionally if mesh itself shows signs fraying badly throughout its structure opting replacement could save hassle down road ultimately leading healthier home environment free pesky intruders ruining peaceful evenings spent outdoors enjoying fresh breezes instead worrying about what might crawl inside unnoticed!
Final Considerations
Repairing window screens is a manageable task requiring minimal tools yet providing rewarding results once completed correctly! By taking measured steps throughout each stage—from assessment through replacement—you'll ensure optimal performance well past season changes allowing uninterrupted airflow paired safety insect-free spaces enjoyed comfortably indoors/outdoors alike!
As always embracing DIY projects fosters sense accomplishment encouraging homeowners everywhere maintain their living spaces efficiently while saving money—who wouldn’t want that?